

Cookies and Brownies
Discover soft, chewy, and bakery-style cookies inspired by the flavors of every season. From holiday favorites to everyday treats, there’s a cookie here for every occasion.
Cookies and Brownies⬇️
🍪 Cranberry Orange Thumbprint Cookies
🍪 Black Velvet Cheesecake Cookies
🍪 Banana Bread Chocolate Chunk Cookies
🍪 Caramel Chocolate Chunk
🍫 Oreo Brownie Cups
🍪 Hocus Pocus Cookies
🍫Halloween S'mores Whoopie Pie
🍪Peanut Butter Dream Cookies
🍪 Nutter Butter Santa Cookies
🍫Spooky Caramel Monster Brownie Bites
🍪Black Cocoa Halloween Oreo Cookies
Cranberry Orange Thumbprint Cookies
Prep Time: 20 minutes
Chill Time: 30 minutes
Bake Time: 12–14 minutes
Total Time: About 1 hour
Yield: Approximately 24 cookies
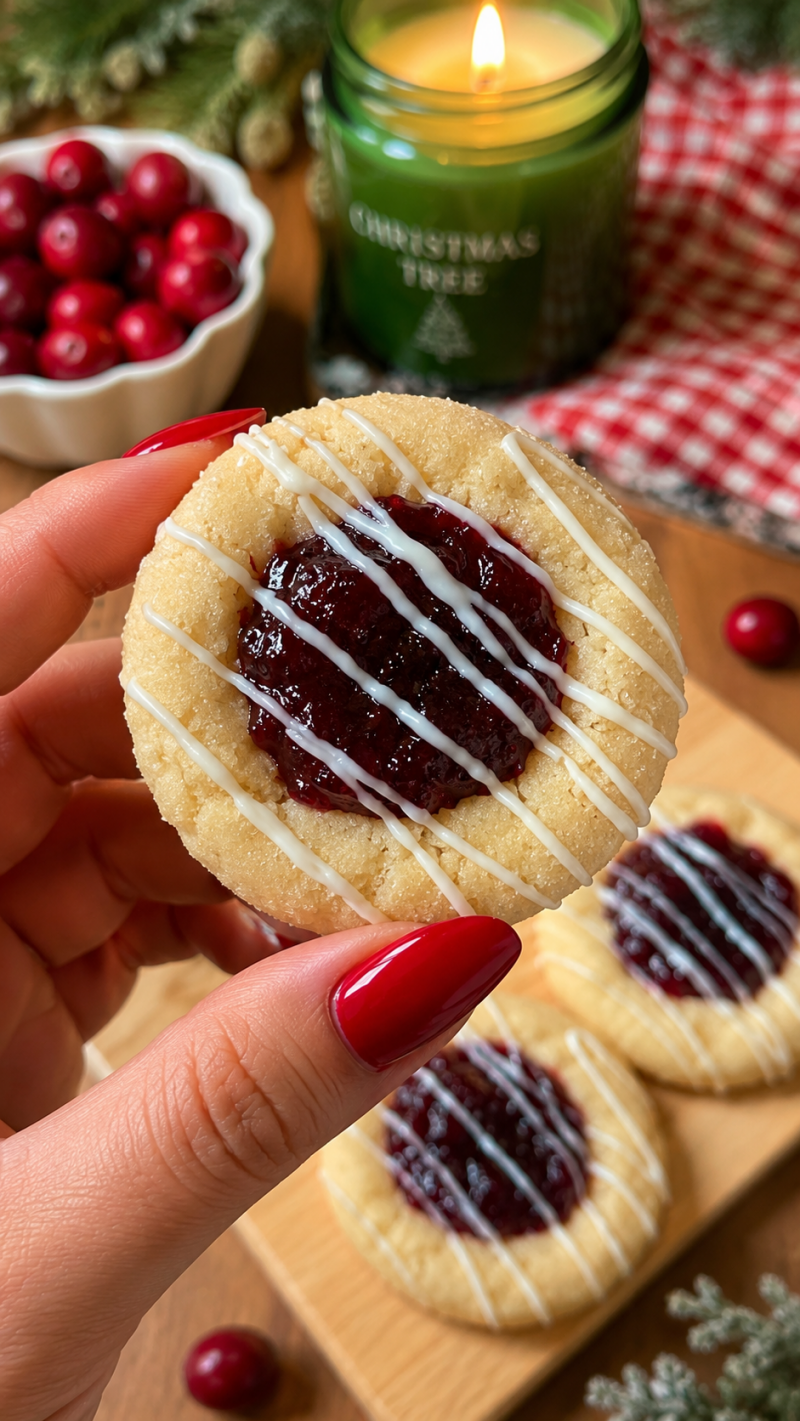
These cranberry orange thumbprint cookies are soft, buttery, and filled with sweet-tart cranberry preserves, then finished with a simple white chocolate drizzle. An easy and festive Christmas cookie recipe for holiday baking, cookie trays, parties, and homemade gifts. 🎄❤️
Cranberry Orange Filling
Ingredients
- 1 (12-ounce) bag fresh or frozen cranberries
- 1 cup fresh orange juice
- ¾ cup packed brown sugar
- 1 teaspoon vanilla bean paste
- Pinch of salt
Instructions
- Combine the cranberries, orange juice, brown sugar, vanilla bean paste, and salt in a medium saucepan.
- Bring to a gentle boil over medium heat.
- Reduce the heat and simmer uncovered for 15–20 minutes, stirring occasionally and gently crushing the cranberries as they burst.
- Remove from the heat once the mixture is thick and jammy. It will continue to thicken as it cools.
- Cool completely before filling the cookies. If the filling is still too loose, strain off a little excess liquid.
Sugar Thumbprint Cookies
Ingredients
- 1 package sugar cookie mix
- ½ cup unsalted butter, softened
- 1 large egg
- 1 teaspoon vanilla extract
- Pinch of salt
- Melted white chocolate, for drizzling (optional)
Instructions
- Preheat the oven to 350°F. Line a baking sheet with parchment paper.
- Combine the sugar cookie mix, softened butter, egg, vanilla, and salt until a soft dough forms.
- Roll the dough into 1½-inch balls and arrange them about 2 inches apart on the baking sheet.
- Use your thumb or the back of a teaspoon to make an indentation in the center of each cookie.
- Bake for 10–12 minutes, until the edges are lightly golden.
- If the centers puff up, carefully press the indentations again while the cookies are warm.
- Cool completely, then spoon the cranberry-orange filling into each center.
- Drizzle with melted white chocolate, if desired.
~~~~~~~~~~~~~~~~~~~~~~~~~~~~~~~~~~~~~
Black Velvet Cheesecake Cookies
Prep Time: 1 hour 15 minutes
Cook Time: 11–13 minutes
Total Time: About 1 hour 30 minutes
Yield: 12–14 large cookies
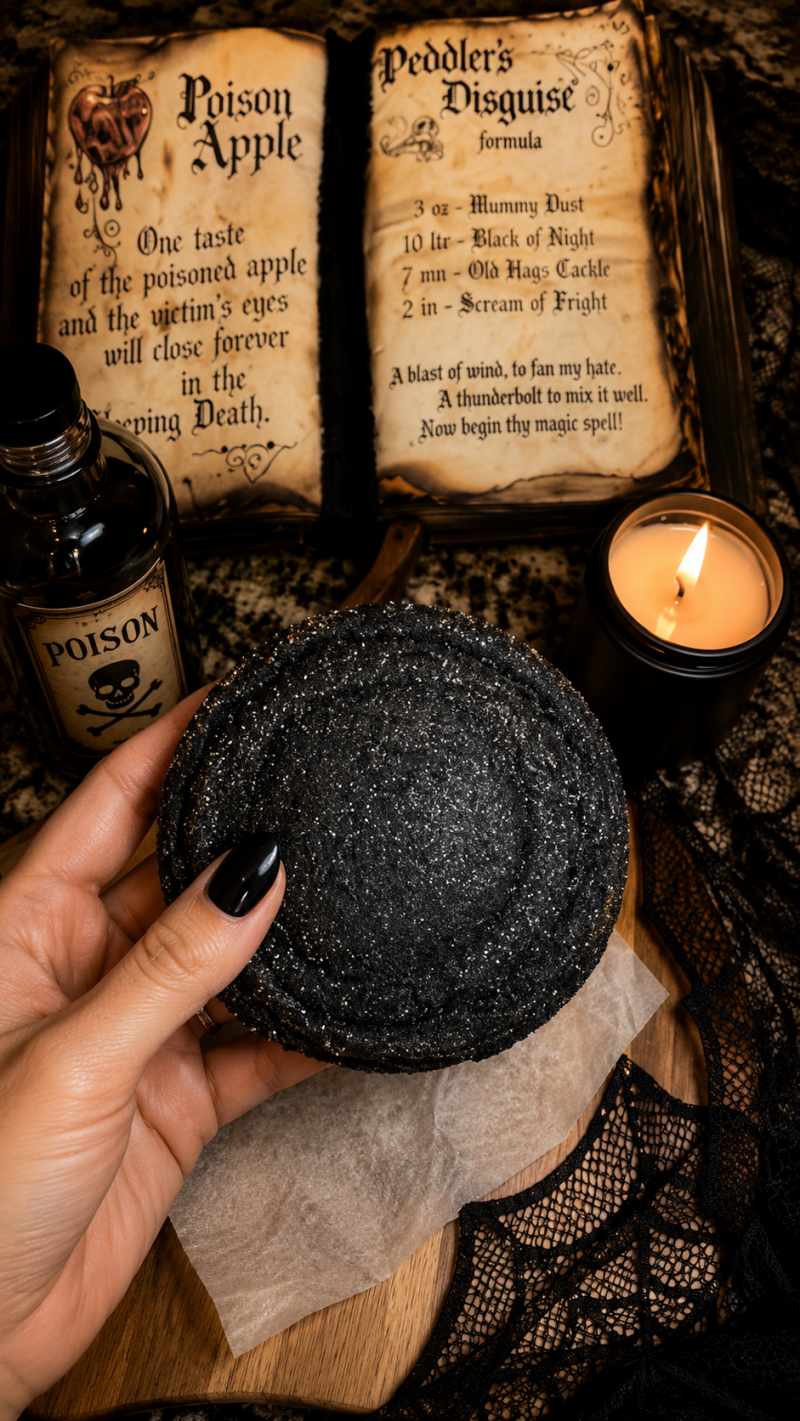
These spooky Black Velvet Cheesecake Cookies get their rich, Oreo-style flavor from black cocoa and have a creamy vanilla cheesecake center tucked inside. Rolled in sparkling black cocoa sugar, they’re soft, dramatic, and perfect for Halloween. 🖤🎃
Ingredients
Black Velvet Cookies
- 2 cups all-purpose flour, plus 1–2 tablespoons if needed
- ½ cup black cocoa powder
- 1 teaspoon baking soda
- ½ teaspoon salt
- 1 cup (2 sticks) unsalted butter, softened
- 1 cup packed brown sugar
- ¾ cup granulated sugar
- 2 large eggs
- 2 teaspoons vanilla bean paste
Cheesecake Filling
- 8 oz cream cheese, softened
- ¼ cup granulated sugar
- 1 teaspoon vanilla extract
Black Cocoa Sugar Coating
- ½ cup granulated sugar
- 2 tablespoons black cocoa powder
Instructions
- Make the cheesecake filling: Beat the cream cheese, sugar, and vanilla until smooth. Scoop into 12–14 small mounds, about 2 teaspoons each, onto a parchment-lined plate or baking sheet. Freeze for 30–45 minutes.
- Make the coating: Whisk together the granulated sugar and black cocoa powder. Set aside.
- Preheat oven to 350°F and line baking sheets with parchment paper.
- Whisk together the flour, black cocoa powder, baking soda, and salt.
- In a separate large bowl, beat the softened butter, brown sugar, and granulated sugar until light and fluffy, about 1–2 minutes.
- Beat in the eggs one at a time, then mix in the vanilla bean paste.
- Gradually add the dry ingredients and mix just until a soft dough forms. Chill the dough for 30 minutes.
- Scoop about 2½ tablespoons of dough and flatten into a disc. Place one frozen cheesecake mound in the center. Add enough dough to completely cover the filling and carefully seal the edges.
- Roll each stuffed cookie in the black cocoa sugar and place about 3 inches apart on the prepared baking sheet.
- Bake for 11–13 minutes, until the edges are set but the centers still look slightly soft.
- Let the cookies cool on the baking sheet for about 10 minutes before transferring to a wire rack.
Tips
For the deepest black color and Oreo-like flavor, use black cocoa powder rather than regular cocoa.
Make sure the cheesecake centers are well frozen before stuffing the cookies—it makes them much easier to seal inside the dough.
Don’t overbake. The cookies will continue setting as they cool, while the cheesecake center stays soft and creamy.
~~~~~~~~~~~~~~~~~~~~~~~~~~~~~~~~~~~~
Banana Bread Chocolate Chunk Cookies 🍪
- Prep Time: 15 minutes
- Bake Time: 10–12 minutes
- Yield: 18 cookies
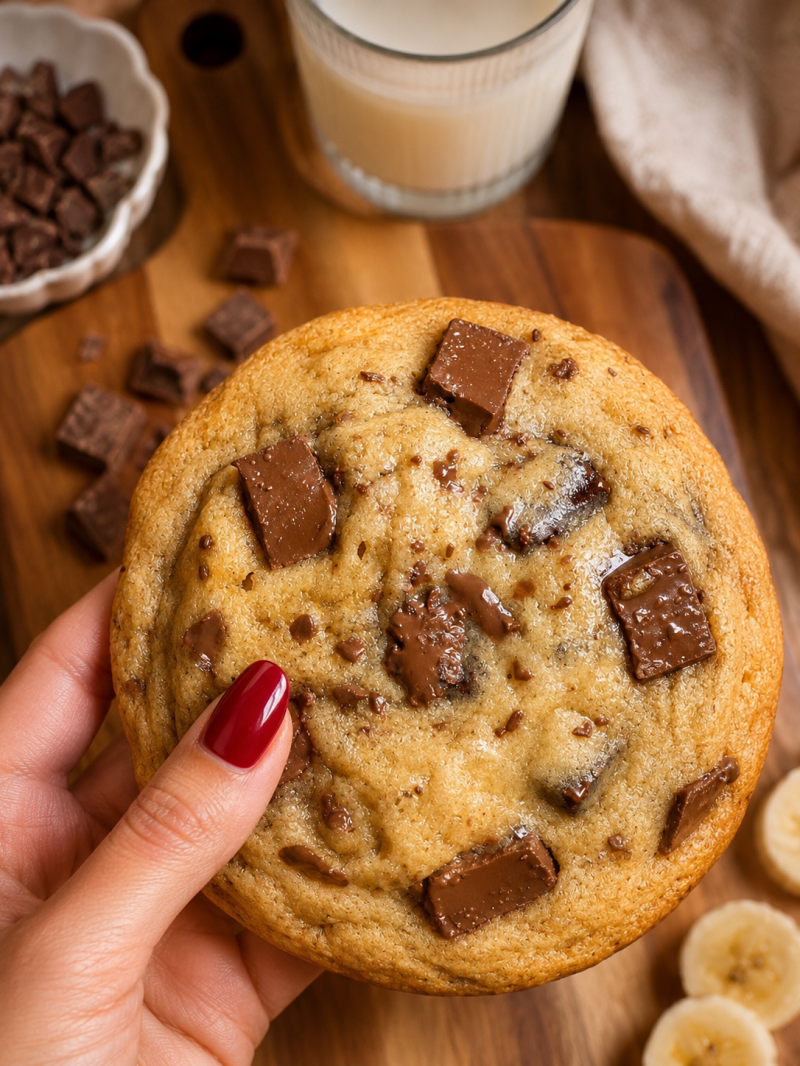
Soft banana cookies loaded with rich chocolate chunks for a cozy twist on classic banana bread.
Ingredients
- 3/4 cup butter shortening
- 1 cup light brown sugar
- 1/2 cup sugar
- 1 mashed banana (about 1 small banana
- 2 eggs
- 1 tsp vanilla
- 2 1/4 cups all-purpose flour
- 1 tsp cinnamon
- 1 tsp baking soda
- 1 tsp salt
- 1 cup chocolate chunks
- Flaky salt
Instructions
- Mix butter + brown sugar, sugar until smooth.
- Add mashed banana, eggs and vanilla.
- Stir in flour, cinnamon, baking soda, and salt.
- Fold in chocolate chunks.
- Scoop onto lined baking sheet.
- Bake at 350°F for 10-12 minutes until edges are golden and centers stay soft.
- Sprinkle flaky salt while warm.
✨Enjoy!
Hope you love these Banana Bread Chocolate Chunk Cookies as much as I do. They’re soft, chewy, packed with chocolate chunks, and the perfect way to use up a ripe banana. Enjoy them with a cold glass of milk or your favorite cup of coffee.
~~~~~~~~~~~~~~~~~~~~~~~~~~~~~~~~~~~~
Caramel Chocolate Chunk Cookies
Prep Time: 15 minutes
Bake Time: 12 minutes
Total Time: 27 minutes
Yield: 12 large cookies

✨Loaded with gooey caramel and rich chocolate chunks, these bakery-style cookies are the perfect combination of soft, chewy, and indulgent. Every bite is packed with sweet caramel goodness and melted chocolate. 🤎🍪
Ingredients
- 1 cup unsalted butter, softened
- 1 cup brown sugar
- ½ cup granulated sugar
- 2 eggs
- 2 tsp vanilla extract
- 2¾ cups all-purpose flour
- 1 tsp baking soda
- 1 tsp salt
- ½ cup caramel bits
- ½ cup chocolate chunks
- ½ cup chocolate chips
Instructions
- Preheat oven to 350°F. Line a baking sheet with parchment paper.
- In a large bowl, cream together the butter, brown sugar, and granulated sugar until light and fluffy.
- Beat in the eggs one at a time, then add the vanilla extract.
- In a separate bowl, whisk together the flour, baking soda, and salt.
- Gradually add the dry ingredients to the wet ingredients and mix until combined.
- Fold in the caramel bits, chocolate chunks, and chocolate chips.
- Scoop large portions of dough onto the prepared baking sheet, spacing them about 2 inches apart.
- Bake for 10–12 minutes, or until the edges are lightly golden and the centers are still soft.
- Allow cookies to cool on the baking sheet for 5 minutes before transferring to a wire rack.
~~~~~~~~~~~~~~~~~~~~~~~~~~~~~~~~~~~~
Oreo Brownie Cups
Prep Time: 10 minutes
Bake Time: 18–22 minutes
Cooling Time: 20 minutes
Total Time: 50 minutes
Yield: 6 brownie cups (or whatever your mold makes)
✨Recipe Note: I used a brownie cup mold for this recipe. The mold is linked in my Amazon Storefront.
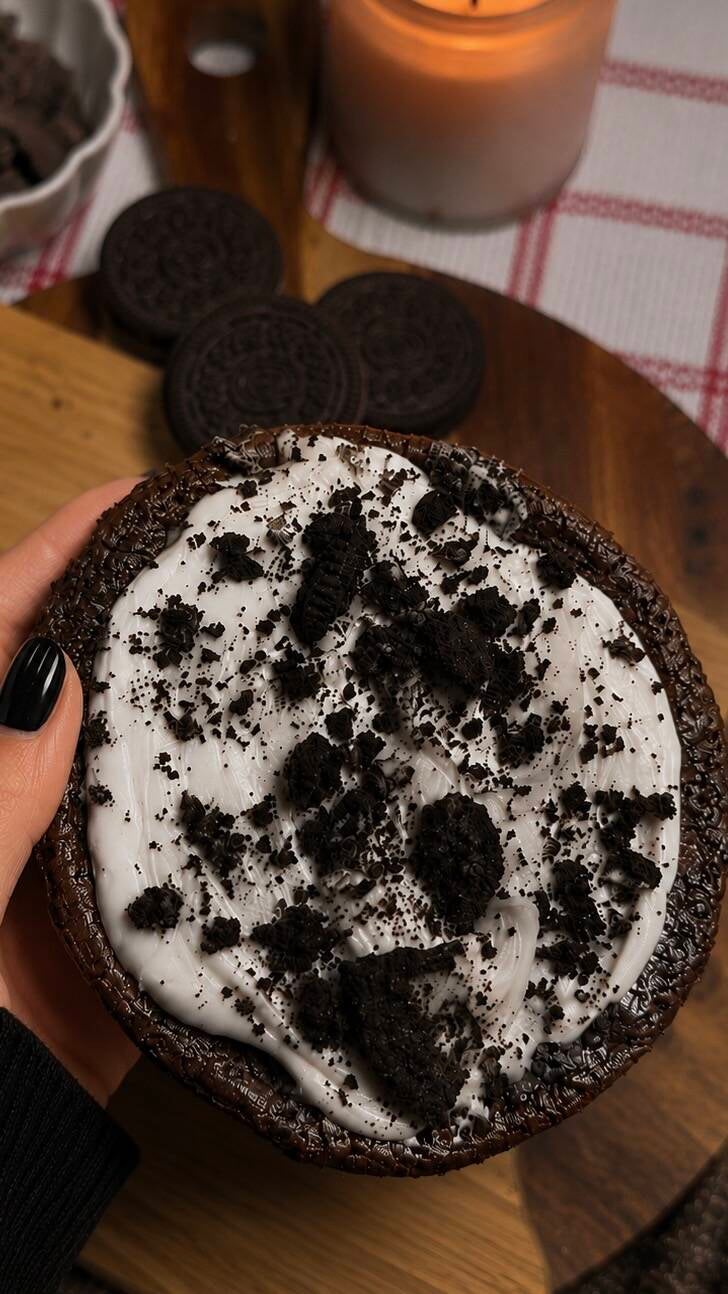
If you love brownies and Oreos, these Oreo Brownie Cups are the perfect treat. Fudgy, creamy, and easy to make, they’re sure to disappear fast!
Ingredients
- 1 box brownie mix (plus ingredients listed on the box)
- 1 teaspoon vanilla extract
- Vanilla frosting (my homemade buttercream recipe in a previous post)
- 1/2 cup Oreo cookies, crushed
- 1/2 cup chocolate chunks
Instructions
- Prepare the brownie batter according to the package directions.
- Add in vanilla, chocolate chunks and crushed Oreos.
- Grease your brownie cup mold.
- Fill each cavity about 2/3 full with brownie batter.
- Bake at 350 for 12-15 minutes or until toothpick comes out clean.
- Let cool completely.
- Top each brownie cup with vanilla frosting.
- Sprinkle with crushed Oreos before serving.
✨These Oreo Brownie Cups are made in a brownie cup mold, creating the perfect chocolate shell for a creamy cookies-and-cream filling. They’re rich, easy to make, and perfect for any Oreo lover!
~~~~~~~~~~~~~~~~~~~~~~~~~~~~~~~~~~~~
Hocus Pocus Cookies 🧡💚💜
Prep Time: 20 minutes
Bake Time: 10–12 minutes
Total Time: 30–32 minutes
Yield: About 12 Medium cookies
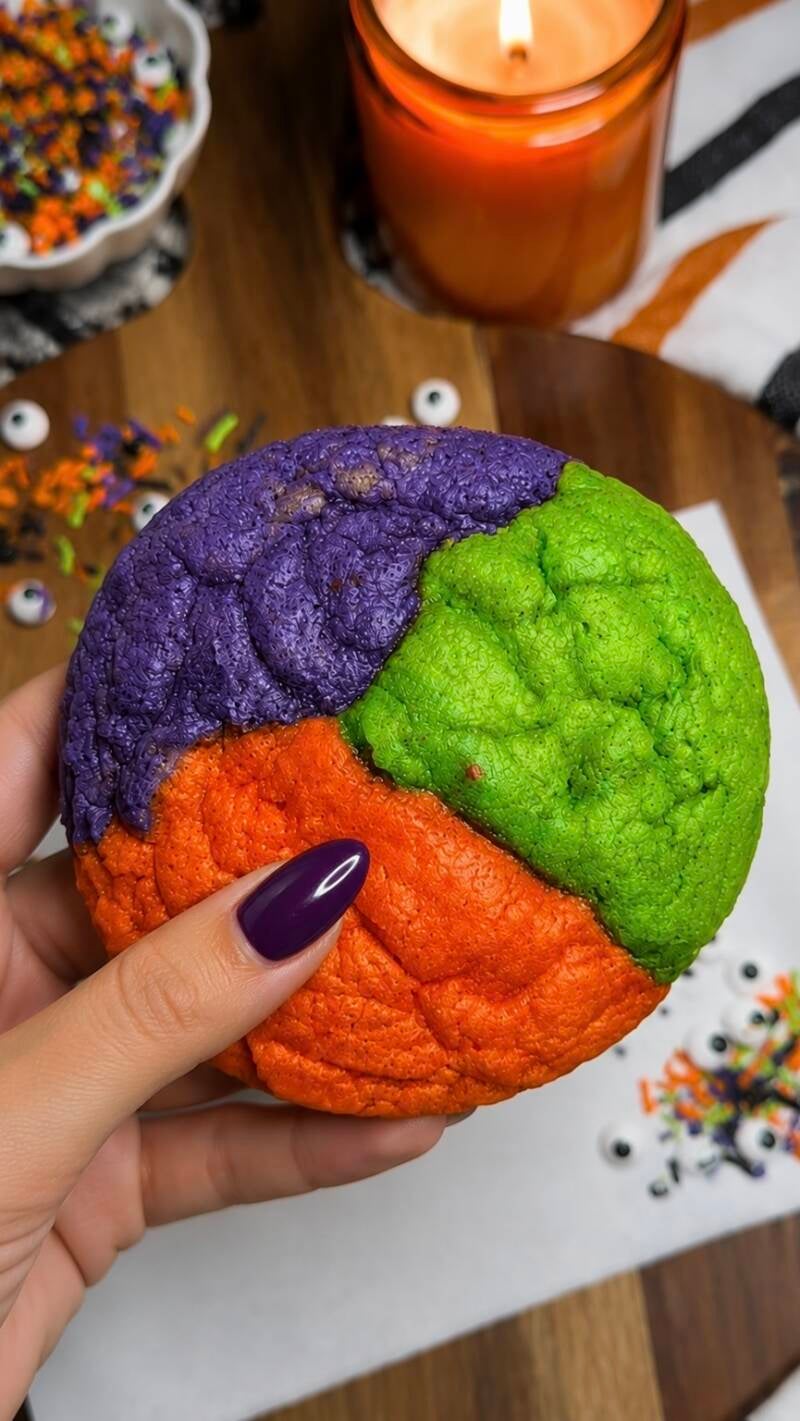
These colorful Hocus Pocus Cookies are soft, chewy, and perfect for Summerween or Halloween celebrations.
Ingredients
- 1 box white cake mix
- 2 eggs
- 1/2 cup vegetable oil
- Purple food coloring
- Green food coloring
- Orange food coloring
Instructions
- Preheat oven to 350°F and line a baking sheet with parchment paper.
- Mix the cake mix, eggs, and oil until a soft dough forms.
- Divide the dough evenly into three bowls.
- Color one bowl purple, one green, and one orange.
- Take a small portion of each color and gently press them together to form a large dough ball. (I use a ice cream scoop to form ball) ✨See video
- Place on the prepared baking sheet.
- Bake for 9–11 minutes or until the edges are set.
- Let cool on the baking sheet for 5 minutes before transferring to a wire rack.
✨These colorful Hocus Pocus Cookies are soft, chewy, and perfect for Summerween or Halloween celebrations. Save this recipe for when you’re craving a little spooky fun in the kitchen!
~~~~~~~~~~~~~~~~~~~~~~~~~~~~~~~~~~~~
Halloween S’mores Whoopie Pies
Prep time: 15 minutes
Bake time: 8–10 minutes
Yield: 10–12 whoopie pies

Soft chocolate cookies filled with fluffy marshmallow creme and rolled in graham cracker crumbs for an easy treat with all the flavors of classic s’mores.
Ingredients
Chocolate Cookies
- 1 box (15.25 ounces) chocolate cake mix
- 2 large eggs
- ½ cup butter, melted and slightly cooled
- 1 teaspoon vanilla extract
- Pinch of salt
- ¾ cup marshmallow bits
Filling
- 1 jar (7 ounces) marshmallow creme
Instructions
- Preheat the oven to 350°F. Line two baking sheets with parchment paper.
- Mix the cake mix, eggs, melted butter, vanilla, and salt until a thick dough forms.
- Fold in the marshmallow bits.
- Scoop the dough onto the prepared baking sheets, spacing each portion about 2 inches apart.
- Bake for 8–10 minutes, until the edges are set but the centers still look slightly soft.
- Cool on the baking sheets for 5 minutes, then transfer to a wire rack to cool completely.
- Spread or pipe 1–2 tablespoons of marshmallow creme onto the flat side of one cookie. Top with another cookie and gently press together.
Peanut Butter Dream Cookies
Prep time: 20 minutes
Bake time: According to package directions
Cooling and decorating: 30 minutes
Yield: Approximately 12–16 cookies
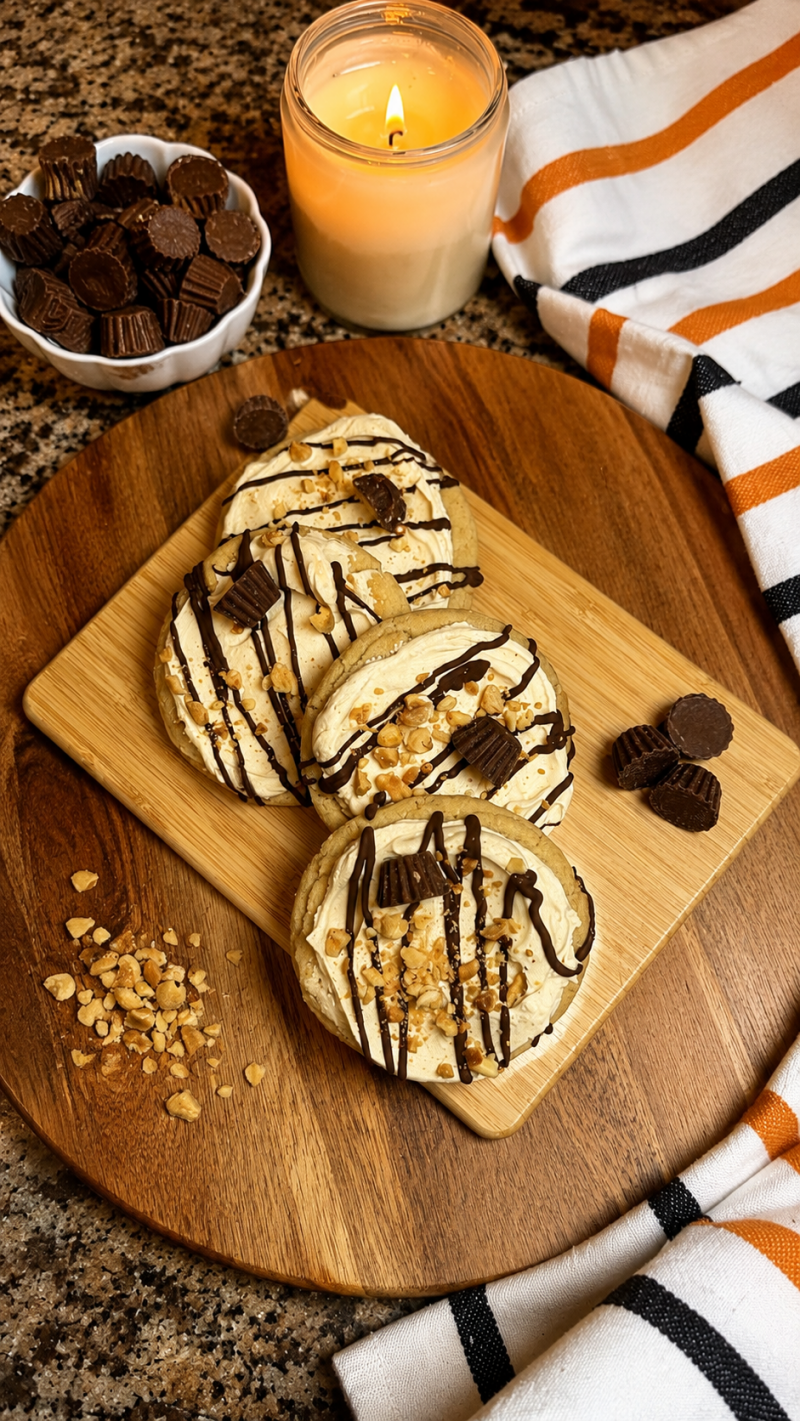
Soft sugar cookies topped with fluffy peanut butter buttercream, chocolate drizzle, crunchy peanuts and mini Reese’s Peanut Butter Cups. These easy cookies are rich, creamy and perfect for every peanut butter lover!
Ingredients
- 1 package refrigerated sugar cookie dough
- 1 cup unsalted butter, softened
- 1 cup creamy peanut butter
- 3 cups powdered sugar
- 2 teaspoons vanilla extract
- 2–3 tablespoons heavy cream
- Pinch of salt
- ½ cup chocolate melting wafers or chocolate chips
- Chopped peanuts, for topping
- Mini Reese’s Peanut Butter Cups, unwrapped
Instructions
- Bake the sugar cookies according to the package directions. Transfer them to a wire rack and allow them to cool completely.
- Beat the softened butter and peanut butter until smooth and creamy.
- Gradually add the powdered sugar and salt, mixing until combined.
- Add the vanilla and 2 tablespoons of heavy cream. Beat on high for approximately 3 minutes, until light and fluffy. Add another tablespoon of cream if needed.
- Spread or pipe the peanut butter buttercream over the cooled cookies.
- Melt the chocolate in short microwave intervals, stirring after each one until smooth.
- Drizzle the melted chocolate over the frosting.
- Sprinkle with chopped peanuts and top each cookie with a mini Reese’s cup.
- Allow the chocolate to set before serving.
Storage
Store the decorated cookies in an airtight container in the refrigerator for up to four days. Allow them to sit at room temperature for about 15 minutes before serving.
~~~~~~~~~~~~~~~~~~~~~~~~~~~~~~~~~~~~~
Nutter Butter Santa Cookies
Prep time: 25 minutes
Chill time: 15 minutes
Servings: 12 cookies

These adorable Nutter Butter Santa Cookies are an easy no-bake Christmas treat made with colorful candy melts, mini marshmallows and red candies. They’re perfect for holiday parties, Christmas cookie trays or a festive activity with the kids!
Ingredients
- 12 Nutter Butter cookies
- 1 cup white candy melts
- ¾ cup red candy melts
- 12 red mini M&M’s or other small red candies
- 12 mini marshmallows, cut in half
- Black decorating icing or melted dark chocolate
Instructions
- Line a baking sheet with parchment paper.
- Melt the white candy melts according to the package directions.
- Dip the bottom portion of each Nutter Butter into the white candy melts to create Santa’s beard. Place on the prepared baking sheet.
- Melt the red candy melts and dip the top of each cookie to create Santa’s hat.
- Add half of a mini marshmallow to the side of the hat while the coating is still wet.
- Attach a red candy just above the beard for Santa’s nose.
- Use black decorating icing or melted chocolate to add two small eyes.
- Refrigerate for 10–15 minutes, or until completely set.
Tips
- Work with one cookie at a time so the decorations stick before the candy coating sets.
- If the candy melts become too thick, stir in a small amount of coconut oil or vegetable shortening.
- Store the finished cookies in an airtight container in the refrigerator for up to five days.
~~~~~~~~~~~~~~~~~~~~~~~~~~~~~~~~~~~~~
Spooky Caramel Monster Brownie Bites
Prep Time: 20 minutes
Bake Time: 10–12 minutes
Yield: About 24 mini brownie bites
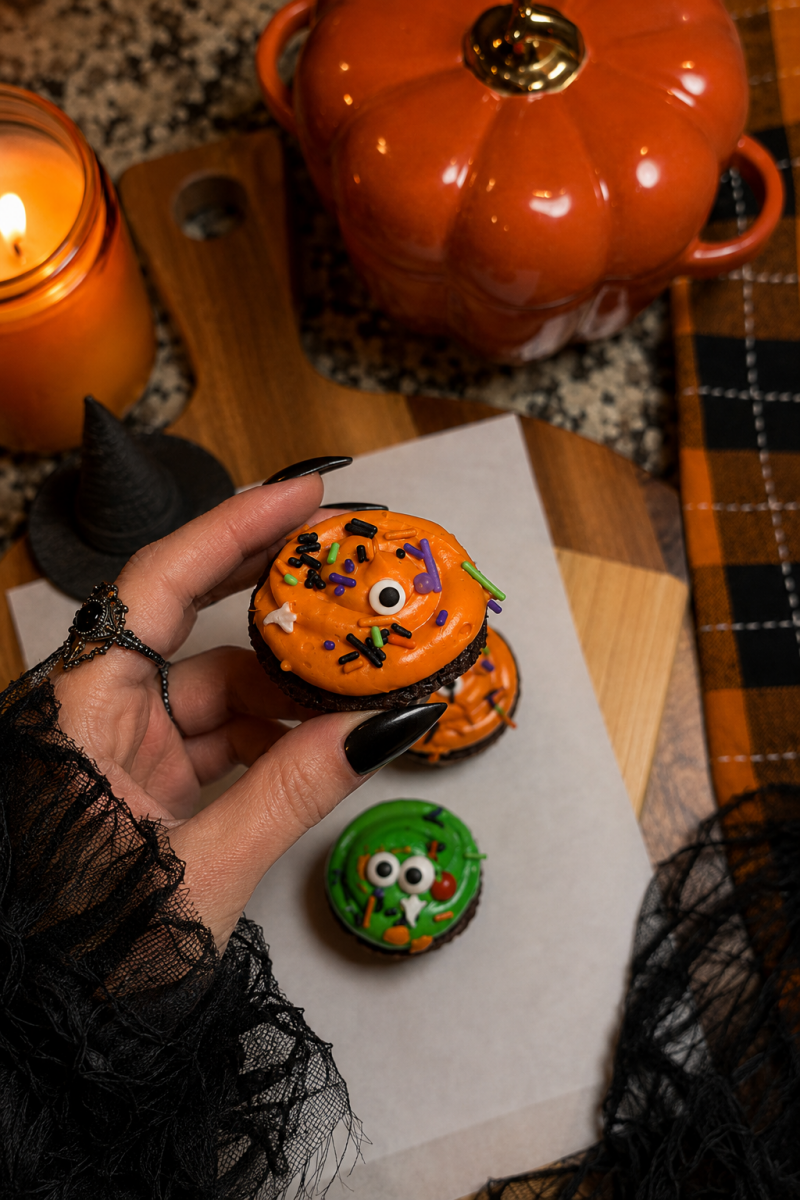
These fudgy little brownie bites are filled with gooey caramel, topped with colorful frosting, Halloween sprinkles, and candy eyeballs. They’re easy to make with a boxed brownie mix and perfect for Halloween parties, treat trays, or a spooky movie night. 🧡💚
Ingredients
- 1 box brownie mix, plus ingredients listed on the box
- 1 teaspoon vanilla extract
- 24 soft caramel candies
- 2–3 tablespoons heavy cream
- About 1½ cups orange and/or green frosting
- Halloween sprinkles
- Candy eyeballs
Instructions
- Preheat oven to 350°F and lightly grease a mini muffin pan.
- Prepare the brownie batter according to package directions, then stir in the vanilla.
- Fill each mini muffin cup about ⅔ full.
- Bake for 10–12 minutes, or until just set.
- Immediately press the center of each brownie with the back of a teaspoon to create a small well.
- Cool completely before removing from the pan.
- Microwave the caramels with 2 tablespoons heavy cream in 15-second intervals, stirring until smooth. Add a little more cream if needed.
- Spoon caramel into each brownie well.
- Pipe or spread orange and green frosting over the tops.
- Decorate with Halloween sprinkles and candy eyeballs.
- Serve right away for a gooier center, or allow them to set before serving.
🧡Easy Halloween brownie bites filled with gooey caramel and topped with colorful frosting, sprinkles, and candy eyes.
~~~~~~~~~~~~~~~~~~~~~~~~~~~~~~~~~~~~~
Black Cocoa Halloween Oreo Cookies
Prep time: 15 minutes
Chill time: 30 minutes
Cook time: 10–12 minutes
Total time: about 55 minutes
Ingredients
- 2 cups all-purpose flour
- ½ cup black cocoa powder
- 1 teaspoon baking soda
- ½ teaspoon salt
- 1 cup (2 sticks) unsalted butter, softened
- 1 cup packed brown sugar
- ¾ cup granulated sugar
- 2 large eggs
- 2 teaspoons vanilla bean paste or vanilla extract
- 12 Halloween Oreos, roughly chopped
- 4–5 additional Halloween Oreos, broken into pieces for topping
Instructions
- In a medium bowl, whisk together the flour, black cocoa powder, baking soda, and salt.
- In a large bowl, beat the softened butter, brown sugar, and granulated sugar until creamy.
- Add the eggs one at a time, mixing well after each addition. Mix in the vanilla.
- Gradually add the dry ingredients and mix just until a soft cookie dough forms.
- Gently fold in the 12 chopped Halloween Oreos.
- Cover and refrigerate the dough for 30 minutes.
- Preheat oven to 350°F and line a baking sheet with parchment paper.
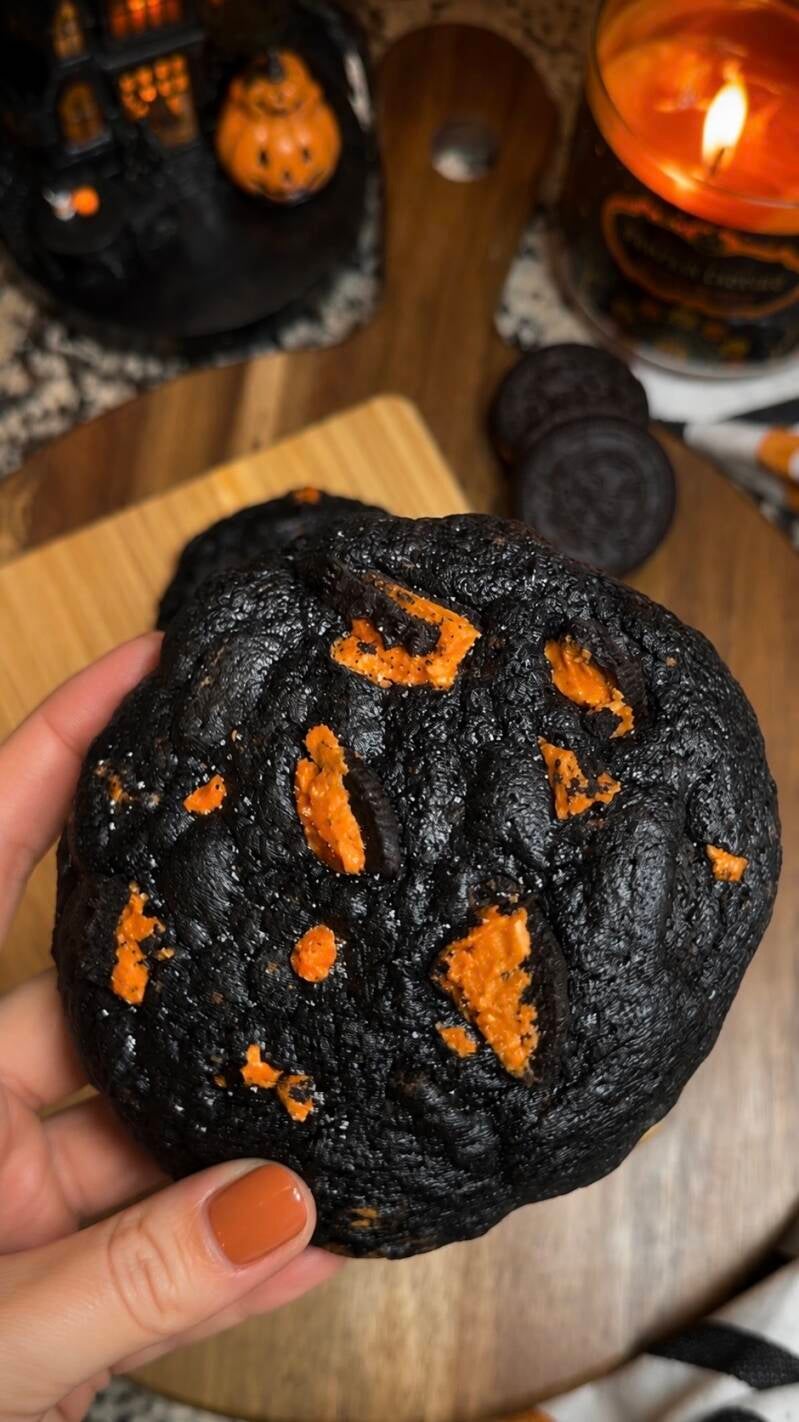
- Scoop the dough into large balls and place them several inches apart on the prepared baking sheet. Press additional Halloween Oreo pieces onto the tops.
- Bake for 10–12 minutes, until the edges are set but the centers still look slightly soft.
- Let the cookies cool on the baking sheet for about 10 minutes before transferring to a cooling rack.